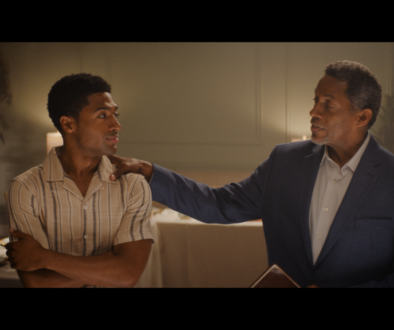
Creating CGI shots for film is an exciting and challenging process that requires careful planning, attention to detail, and a deep understanding of the technology and tools involved. In this article, we will explore the essential steps involved in creating this CGI shot for the film “a Christmas mystery”, from modeling and animation to the final composite.
Step 1: Concept and Pre-visualization
Before any modeling or animation work begins, it is crucial to have a clear understanding of the desired shot and the story it needs to tell. This involves developing a concept and pre-visualizing the shot. Pre-visualization is the process of creating a rough animation of the shot using basic geometry and motion. This helps to visualize the final product and identify any potential issues that may arise during production.
Step 2: Modeling
Once the concept is established, the next step is to create 3D models of the objects and characters that will be used in the shot. The modeling process can take a significant amount of time, depending on the complexity of the objects and characters involved.
Step 3: Texturing
After the models are created, the next step is to add textures and materials to them. Texturing involves applying digital images or patterns to the models to give them a realistic appearance. This can be done using Photoshop.
Step 4: Rigging
Rigging is the process of creating a digital skeleton for the characters in the shot. This skeleton allows animators to manipulate the characters’ movements in a way that looks natural and realistic. Rigging can be a complex process that requires a deep understanding of anatomy and motion.
Step 5: Animation
With the models, textures, and rigging in place, it is time to animate the characters and objects in the shot. This involves creating keyframe animations, which are a series of poses that define the motion of the characters and objects over time. To help speed up the process we used some motion capture and then clean up in Blender to create these animations.
Step 6: Lighting
Once the animation is complete, the next step is to add lighting to the scene. Lighting can have a significant impact on the overall look and feel of the shot, so it is essential to get it right. Lighting involves adding light sources to the scene and adjusting their intensity, color, and direction to create the desired effect.
Step 7: Rendering
After the lighting is in place, it is time to render the shot. Rendering involves using a specialized render engine called Arnold, to generate high-quality images of the scene. The rendering process can be time-consuming even on our render farm as it involves calculating the appearance of every pixel in the final image.
Step 8: Compositing
The final step in creating the CGI shot is compositing. Compositing involves combining the rendered images with any additional visual effects, such as volumetric fog, haze. This was done using Nuke.
In conclusion, creating a CGI shot for film involves a complex and time-consuming process that requires a deep understanding of modeling, animation, lighting, and compositing. By following these essential steps, we can create stunning visual effects that enhance the story and captivate audiences.


